|
|
||
|---|---|---|
| .. | ||
| img | ||
| README.md | ||
| wolfcryptjni.props | ||
| wolfcryptjni.sln | ||
| wolfcryptjni.vcxproj | ||
| wolfcryptjni.vcxproj.filters | ||
README.md
wolfCrypt JNI/JCE Windows Support
wolfCrypt JNI/JCE supports building on Windows using Visual Studio.
This README includes instructions and tips for building wolfCrypt JNI/JCE on Windows, along with environment setup instructions. wolfCrypt JNI/JCE depends on and links against the native wolfSSL SSL/TLS library. As such, native wolfSSL will need to be compiled first. Further instructions are below.
Windows Environment Setup
JDK and JAVA_HOME
Make sure you have downloaded and installed a Java Developer Kit (JDK). Once
a JDK has been installed, JAVA_HOME needs to be configured as a Windows
environment variable.
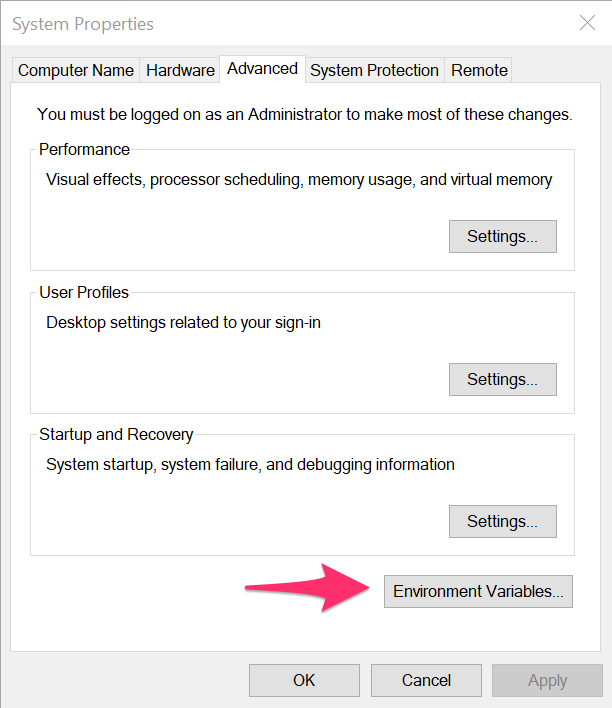
- Open the "Environment Variables" window. This can be found by searching for "Environment Variables", or by opening "System Properties", clicking on the "Advanced" tab, then "Environment Variables...".
- In "Environment Variables", add a new variable called
JAVA_HOMEunder "System variables". The value for this variable should point to your JDK installation location. For example:
C:\Program Files\Java\jdk1.8.0_361

Apache Ant and ANT_HOME
Apache ant needs to be downloaded in order to build the Java .JAR component of this package.
- Download Apache Ant from the
Apache Ant Binary Distributions page.
On the download page there should be a binary zip file. For example,
apache-ant-1.10.13-bin.zip. Unzip this archive to a location on your PC where you would like to install Apache Ant.

- After you have downloaded and installed
ant, configure a new Windows environment variable calledANT_HOME. Follow similar steps as above to open the "Environment Variables" window. The value of this variable should be the directory that you placed ant in. For example:
C:\apache-ant-1.10.13

- After
ANT_HOMEhas been configured as an environment variable, the WindowsPathneeds to be updated to contain theANT_HOMElocation.
- Open "Environment Variables" window.
- Under "System variables", edit the "Path" variable.
- Add a new entry at the bottom of the
Pathvalue list for%ANT\_HOME%\bin.


- To test that
anthas been correctly installed:
- Open a Command Prompt window
- Typing
ant -vshould output something similar to the following:
ANT_OPTS is set to  -Djava.security.manager=allow
Apache Ant(TM) version 1.10.13 compiled on January 4 2023
Trying the default build file: build.xml
BuildFile: build.xml does not exist!
Build failed
Microsoft Visual Studio
These instructions have been tested with Visual Studio 2019, although other versions should work as well. If not installed, download and install before continuing these instructions.
Directory Setup Structure
The Visual Studio projects included in this directory assume that the wolfCrypt
JNI/JCE and wolfSSL SSL/TLS directories are side-by-side on the file system,
and that the directories for each are simply named wolfssl and wolfcryptjni.
This may require renaming the wolfSSL and wolfCrypt JNI/JCE directories.
For example, your high-level directory structure should look like:
C:\wolfssl
C:\wolfcryptjni
Building wolfSSL SSL/TLS Library
For instructions on building the wolfSSL SSL/TLS DLL, see wolfSSL Manual Chapter 2 Building on Windows, or Using wolfSSL with Visual Studio.
There are a few different Visual Studio solutions which will compile wolfSSL, depending on what variant of wolfSSL you would like to build. Notes on each are provided below.
Normal wolfSSL (non-FIPS)
To build a normal, non-FIPS wolfSSL DLL, use the Visual Studio solution file located in the root of the wolfSSL package:
<wolfssl>\wolfssl64.sln
This will contain build configurations for both 32-bit and 64-bit DLL's, with either "DLL Debug" or "DLL Release". wolfCrypt JNI/JCE will expect to link against a wolfSSL DLL library.
wolfSSL proper's Visual Studio projects use a custom user_settings.h header
file to customize preprocessor defines and configuration for the wolfSSL
library build. The user_settings.h header that is used for this non-FIPS build
is located at:
<wolfssl>\IDE\WIN\user_settings.h
When builidng wolfSSL for use with wolfCrypt JNI/JCE, edit this header file
before compiling the library DLL and insert the following defines above the
section titled /* Configuration */:
#define WOLFSSL_KEY_GEN
#define HAVE_CRL
After editing and saving the user_settings.h file, select one of the following
DLL Library configurations and build the wolfSSL library solution:
- Win32 | DLL Debug
- Win32 | DLL Release
- x64 | DLL Debug
- x64 | DLL Release
The wolfSSL library DLL will be built and placed under one of the following directories:
wolfssl\DLL Debug\Win32wolfssl\DLL Debug\x64wolfssl\DLL Release\Win32wolfssl\DLL Release\x64
When bulding wolfCrypt JNI/JCE, the Visual Studio project file for that library will look in the above locations to link against the wolfSSL DLL matching the same build configuration.
wolfSSL FIPS 140-2 (Certificate #3389)
To build a wolfSSL FIPS 140-2 variant of wolfSSL for use with FIPS 140-2
certificate #3389 or later, use the Visual Studio solution file located under
the IDE\WIN10 directory inside the wolfSSL FIPS release package:
<wolfssl>\IDE\WIN10\wolfssl-fips.sln
Follow build instructions in the FIPS User Guide PDF included with the FIPS release package.
In summary:
- Open the above Visual Studio solution file.
- Select one of the following build configurations:
- x64 | DLL Debug
- x64 | DLL Release
- Open Project properties for the
wolfsslandtestprojects, go toC/C++ -> Preprocessor, and changeHAVE_FIPS_VERSION=5toHAVE_FIPS_VERSION=2. - Open the
user_settings.hfile under<wolfssl>\IDE\WIN10\user_settings.hand set the values forHAVE_FIPS,HAVE_FIPS_VERSION, andHAVE_FIPS_VERSION_MINORto the following:
#if 1
#undef HAVE_FIPS
#define HAVE_FIPS
#undef HAVE_FIPS_VERSION
#define HAVE_FIPS_VERSION 2
#undef HAVE_FIPS_VERSION_MINOR
#define HAVE_FIPS_VERSION_MINOR 0
#endif
- When building for wolfCrypt JNI/JCE, add the following to the
user_settings.hfile mentioned in the previous step:
#define WOLFSSL_KEY_GEN
#define HAVE_CRL
- Build the
wolfssl-fipsproject, which will create a DLL in one of the following locations:
<wolfssl>\IDE\WIN10\DLL Debug\x64\wolfssl-fips.dll
<wolfssl>\IDE\WIN10\DLL Release\x64\wolfssl-fips.dll
- Build the
testproject inside the wolfSSL Visual Studio solution, then run the wolfCrypt test by right clicking on thetestproject, selectingDebug, thenRun New Instance.
If a error shows up with "In Core Integrity check FIPS error", copy the
provided hash value, open fips_test.c, update the verifyCore array with
the given hash, then re-compile the wolfssl-fips DLL. This is the FIPS
Power-On Integrity Check, which runs an HMAC-SHA256 over the object files
within the FIPS module boundary.
Re-compiling the test project and re-running the application should result
in the wolfCrypt tests successfully running.
See the FIPS User Guide for more details on the FIPS verifyCore hash, or email support@wolfssl.com.
wolfSSL FIPS 140-3 (Upcoming)
To build a version of wolfSSL that has been submitted for FIPS 140-3, use
the Visual Studio solution file under the IDE\WIN10 directory inside the
wolfSSL package:
<wolfssl>\IDE\WIN10\wolfssl-fips.sln
Follow instructions in the above section for 140-2 / 3389, except use the
following values for HAVE_FIPS, HAVE_FIPS_VERSION, and
HAVE_FIPS_VERSION_MINOR in user_settings.h:
#if 1
#undef HAVE_FIPS
#define HAVE_FIPS
#undef HAVE_FIPS_VERSION
#define HAVE_FIPS_VERSION 5
#undef HAVE_FIPS_VERSION_MINOR
#define HAVE_FIPS_VERSION_MINOR 1
#endif
The following additional defines will also need to be added to
user_settings.h like above, for compilation and use with wolfCrypt JNI/JCE.
#define WOLFSSL_KEY_GEN
#define HAVE_CRL
For additional help, contact support@wolfssl.com.
Building wolfCrypt JNI/JCE Library
After the wolfSSL SSL/TLS library DLL has been built (above), the wolfCrypt JNI/JCE library DLL can then be built using the Visual Studio solution located in this directory.
-
Open the Visual Studio solution
wolfcryptjni.slnunder this directory. -
Select the build configuration which matches the one you built wolfSSL proper above for. The following are the possible build configurations for the
wolfcryptjniproject:
- Win32 | DLL Debug
- Win32 | DLL Release
- x64 | DLL Debug
- x64 | DLL Release
- x64 | DLL Debug FIPS (Requires wolfSSL FIPS 140-2/140-3 archive)
- x64 | DLL Release FIPS (Requires wolfSSL FIPS 140-2/140-3 archive)
- Build Solution
This will first compile the wolfcryptjni.dll library and place it under one
of the following build directories, based on build configuration:
wolfcryptjni\IDE\WIN\DLL Debug\Win32wolfcryptjni\IDE\WIN\DLL Debug\x64wolfcryptjni\IDE\WIN\DLL Debug FIPS\x64wolfcryptjni\IDE\WIN\DLL Release\Win32wolfcryptjni\IDE\WIN\DLL Release\x64wolfcryptjni\IDE\WIN\DLL Release FIPS\x64
It will also run a post-build action which runs ant from the wolfcryptjni
root directory. Specifically, this will either run ant build-jce-debug for
DLL Debug builds, or ant build-jce-release for DLL Release builds. This
compiles the Java JAR file, and places that in the following directory.
wolfcryptjni\lib\wolfcrypt-jni.jar
Running ant Tests
wolfCrypt JNI/JCE includes ant tests that can be run from a Windows Command
Prompt or other shell that has access to the ant executable.
You will need to download the following JUnit JAR files in order to run the wolfSSL JNI/JCE tests:
junit-4.13.2.jar hamcrest-all-1.3.jar
Download and place these JAR files on your system, noting the location to be
used below to set the JUNIT_HOME environment variable.
After wolfSSL and wolfCrypt JNI/JCE have been compiled using the above steps, the ant tests can be run with the following steps:
- Open the Windows Command Prompt
- Set the
JUNIT_HOMEenvironment variable to point to the directory which contains the JUnit JAR files you downloaded above:
set JUNIT_HOME=path\to\junit\jar\directory
- Navigate to the
wolfcryptjnidirectory
cd path\to\wolfcryptjni
- Run one of the following ant test targets, depending on what library build configuration you compiled:
ant test-win32-debug
ant test-win32-release

ant test-win64-debug
ant test-win64-release

ant test-win32-debug-fips
ant test-win32-release-fips

ant test-win64-debug-fips
ant test-win64-release-fips
JAR Code Signing / JCE cannot authenticate the provider wolfJCE
The Oracle JDK/JVM requires that JCE providers which implement several of the JCE classes be signed by a code signing certificate issued by Oracle.
Full details on obtaining a JCE Code Signing Certifciate can be found here:
http://www.oracle.com/technetwork/java/javase/tech/getcodesigningcertificate-361306.html
For instructions on signing the "wolfcrypt-jni.jar" file generated by the ant build system, please see the main README.md included in this package.
Using a Pre-Signed JAR File
wolfSSL Inc. has its own set of code signing certificates from Oracle that allow wolfJCE to be authenticated in the Oracle JDK. With each release of wolfJCE, wolfSSL ships two pre-signed versions of the ‘wolfcrypt-jni.jar”, located at:
wolfcrypt-jni-X.X.X/lib/signed/debug/wolfcrypt-jni.jar
wolfcrypt-jni-X.X.X/lib/signed/release/wolfcrypt-jni.jar
One of these pre-signed JARs can be used with the JUnit tests, without having to re-compile the Java source files. To run the JUnit tests against this JAR file:
$ cd wolfcrypt-jni-X.X.X
$ cp ./lib/signed/release/wolfcrypt-jni.jar ./lib
$ ant test
Running Examples
Windows batch scripts have been included to easily run some of the provided examples from the Windows command line.
After the above steps have been followed to compile native wolfSSL and wolfCrypt JNI/JCE, open a Command Prompt and navigate to the wolfCrypt JNI/JCE directory root (ie: wolfcryptjni).
The examples are already compiled as part of running ant above.
Edit the Windows configuration batch script to set the appropriate paths for native wolfSSL and wolfCrypt JNI DLL locations. This can change between build types (ex: normal wolfSSL, FIPS 140-2, etc):
Edit examples\WindowsConfig.bat
From the root wolfcryptjni directory, run the desired .bat file. For example, to run the ProviderTest:
examples\provider\ProviderTest.bat
Support
For support, please contact support@wolfssl.com.